1. Introduction to Git and GitHub
1.1. Git
Git is a distributed version control system designed to track changes in any set of files. It is a multiplatform program and is usually integrated into different modern text-editors.
Important
The following commands assume you are in a Linux environment however, the same commands can be used in Windows PowerShell
1.1.1. Installation
Get last
gitinstallation file.Execute the file
Git-x.xx.x-64-bit.exeFollow the automated installation.
Get Git from your Linux distribution repository (e.g. apt).
$ sudo apt install git-all
There is several ways to install Git on a Mac. The easiest is probably to install the Xcode Command Line Tools and try to run git from the Terminal.
$ git --version
If you do not have it installed already, it will prompt you to install it.
1.2. GitHub
GitHub is a code hosting platform for version control and collaboration. It lets you and others work together on projects from anywhere.
GitHub and similar services (including GitLab and BitBucket) are websites that host a Git server program to hold your code.
Thus using git you can communicate with the remote hosting services.
1.2.1. Create a GitHub account
The easiest way to get started is to create an account on GitHub website (it is free).

Fig. 1.1 GitHub homepage.
1.2.2. Fork the repository
Go to the source code repository website and by clicking on the fork button on the top of the page (step 1 at Fig. 1.2). This will create a copy of this repository in your account.
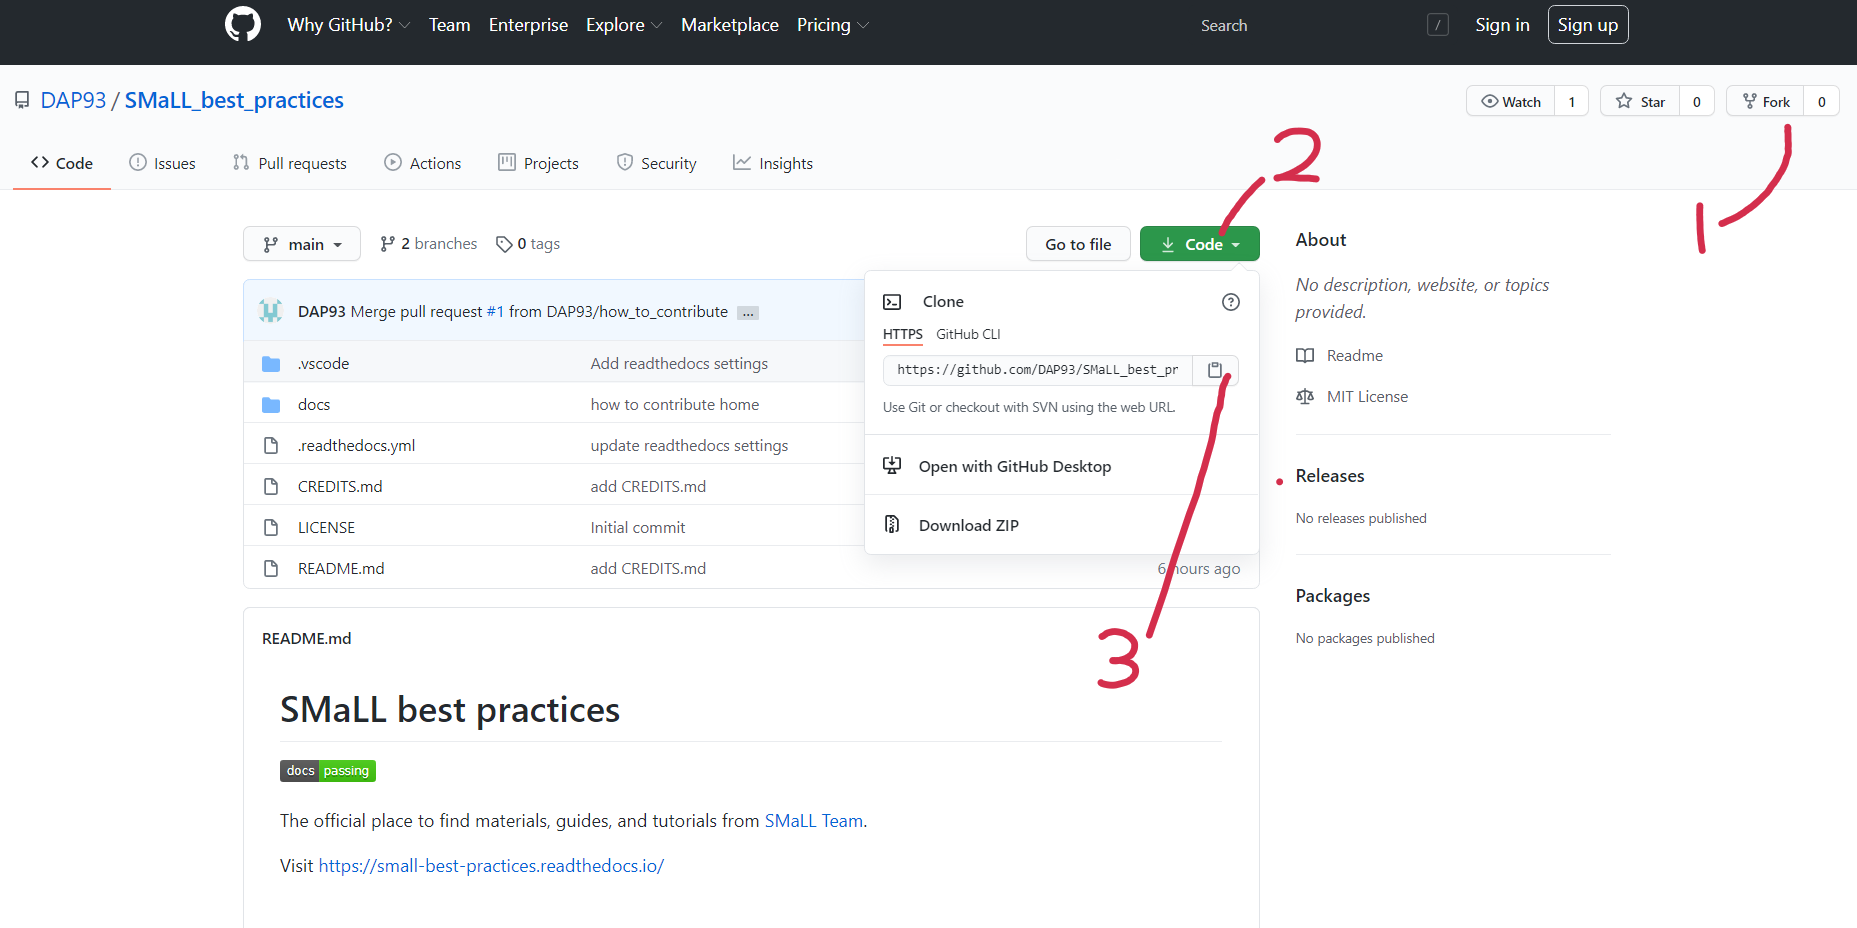
Fig. 1.2 Fork and clone the repository.
1.2.3. Clone the repository
Now clone the forked repository to get a copy on your local machine using the command git clone.
Go to your GitHub account, open the forked repository, click on the green code button, and then click the copy to clipboard icon (step 2 and 3 at Fig. 1.2). And in the terminal type:
$ git clone https://github.com/<your_username>/SMaLL_best_practices.git
Where you have to replace <your_username> with your GitHub username.
1.2.4. Create a Branch
Branching is the way to work on different versions of a repository at one time (Fig. 1.3).
To create a branch first, you have to move to the repository directory on your computer:
$ cd SMaLL_best_practices
Now create a branch using the git checkout command:
$ git checkout -b <your-new-branch-name>
Where <your-new-branch-name> is the name of the branch.
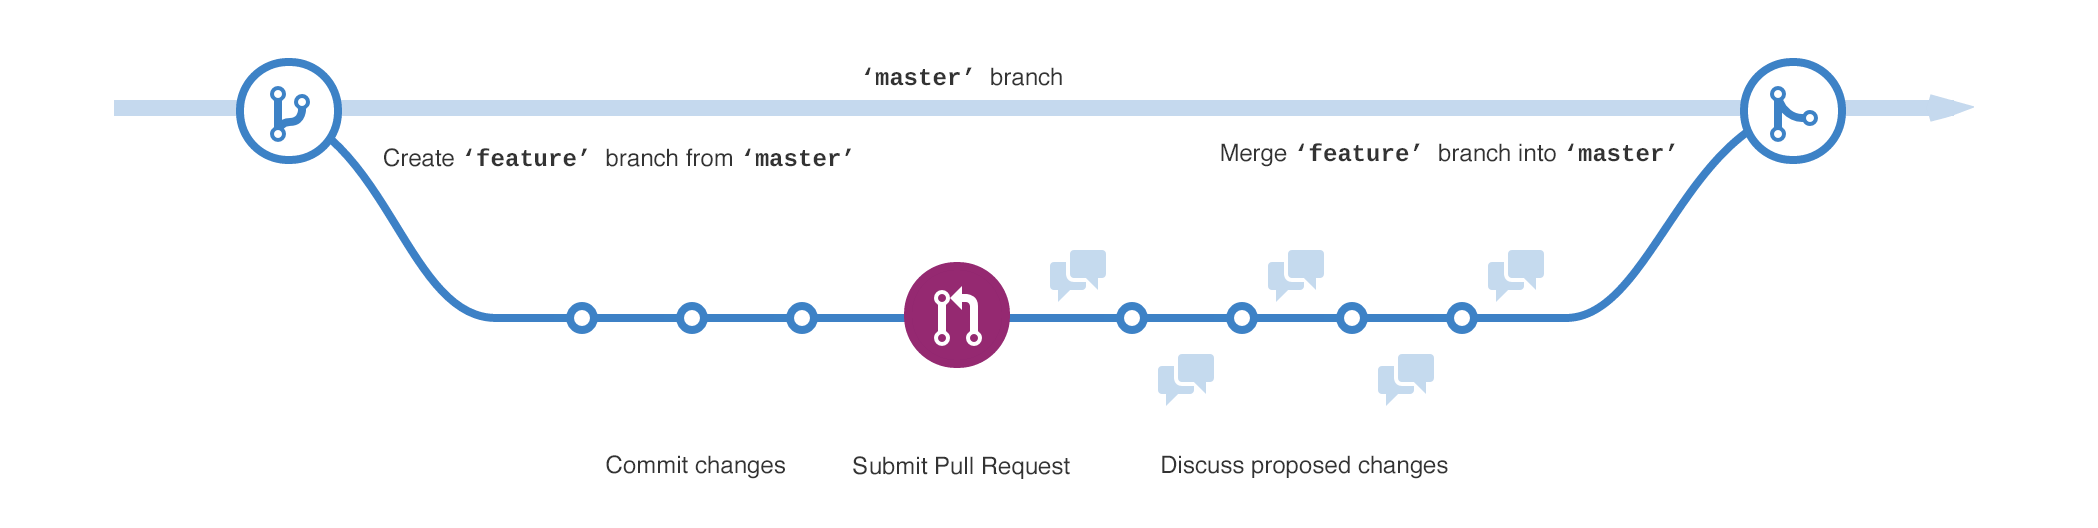
Fig. 1.3 Create, submit and merge a branch named feature.
Important
The branch name as to be a single word, thus replace the spaces with the underscore _
Note
The name of the branch does not need to have the word add in it, but it’s a reasonable thing to include because the purpose of this branch is to add your name to a list and its main changes.
1.2.5. Setup python environment
Now that you have all the documentation in your local machine, you can have to install the minimum required python packages.
$ pip3 install -r SMaLL_best_practices/docs/requirement.txt
We suggest creating a virtual python environment outside the repository folder (see Python basics).
Important
If the virtual python environment is inside the repository folder, once you will push (upload) your chage, you
will upload the virtual environment too.
1.2.6. Make your changes and commit those changes
Now you can start to make your changes; the file format to use is the reStructuredText (.rst), basic concepts is available
in the section reStructuredText, for a more exhaustive guide, also read the Sphinx page.
To check your changes, respect the old documentation, you can run the command git status.
Once you finish modifying a page, you can upload it to GitHub with the command git commit.
First, you add the changed files to the list of the commit:
$ git add <file name>
or all the folder
$ git add .
Then you can define a commit associated with the selected files.
$ git commit -m "<comment>"
Example:
$ git add ./doc/source/exmaple.rst
$ git commit -m "add the page ./doc/source/exmaple.rst"
Note
You can think of the git commit command as a special way to save your progress since instead to have many changes in only one
commit, you brake it into smaller parts
1.2.7. Compile locally
To see the changes, you have to ways:
Using Visual Studio Code and the reStructuredText extension (or similar) to get a preview of the web page (see the page Suggested editor)
Compile the documentation with the command
make HTML$ make html # linux/macos > .\make.bat html # windows
If there are no errors, you will get something similar to what you see in Fig. 1.4.
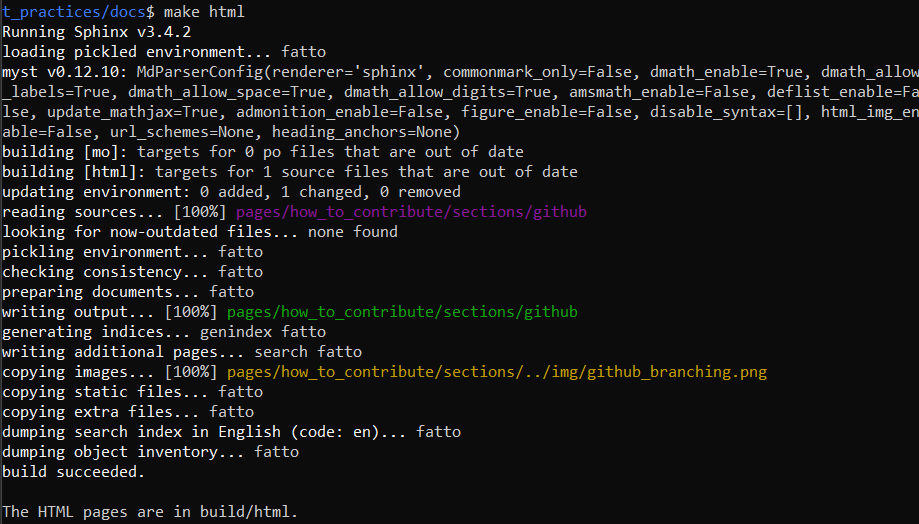
Fig. 1.4 make HTML output.
Then in the subfolder ./docs/build/HTML, you have all the HTML files, and you can see how your changes will appear in the website.
Note
Try to solve all the errors or warnings, and compile more time untile it prints a clean output.
1.2.8. Push changes to GitHub
Push (upload) your changes using the command git push:
$ git push origin <add-your-branch-name>
Replace <add-your-branch-name> with the name of the branch you created earlier.
1.2.9. Submit your changes for review
If you go to your repository on GitHub, you will see a Compare & pull request button. Click on that button.
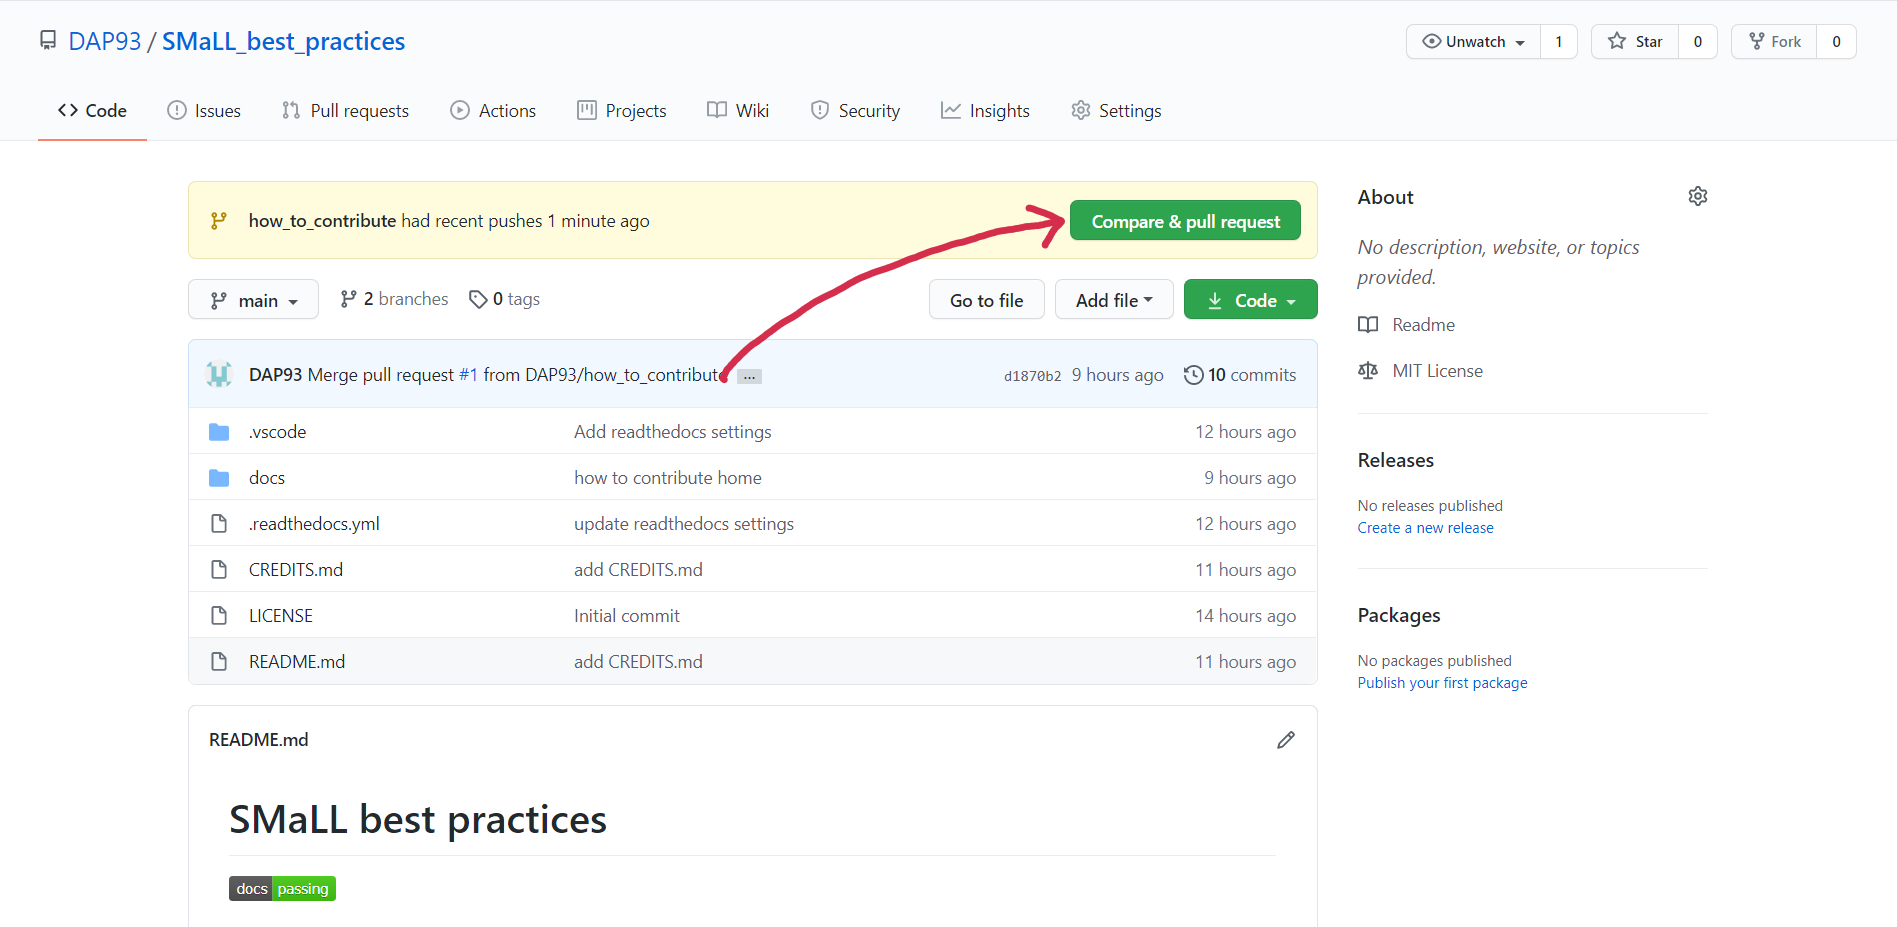
Fig. 1.5 Compare & pull request button.
Now submit the pull request.
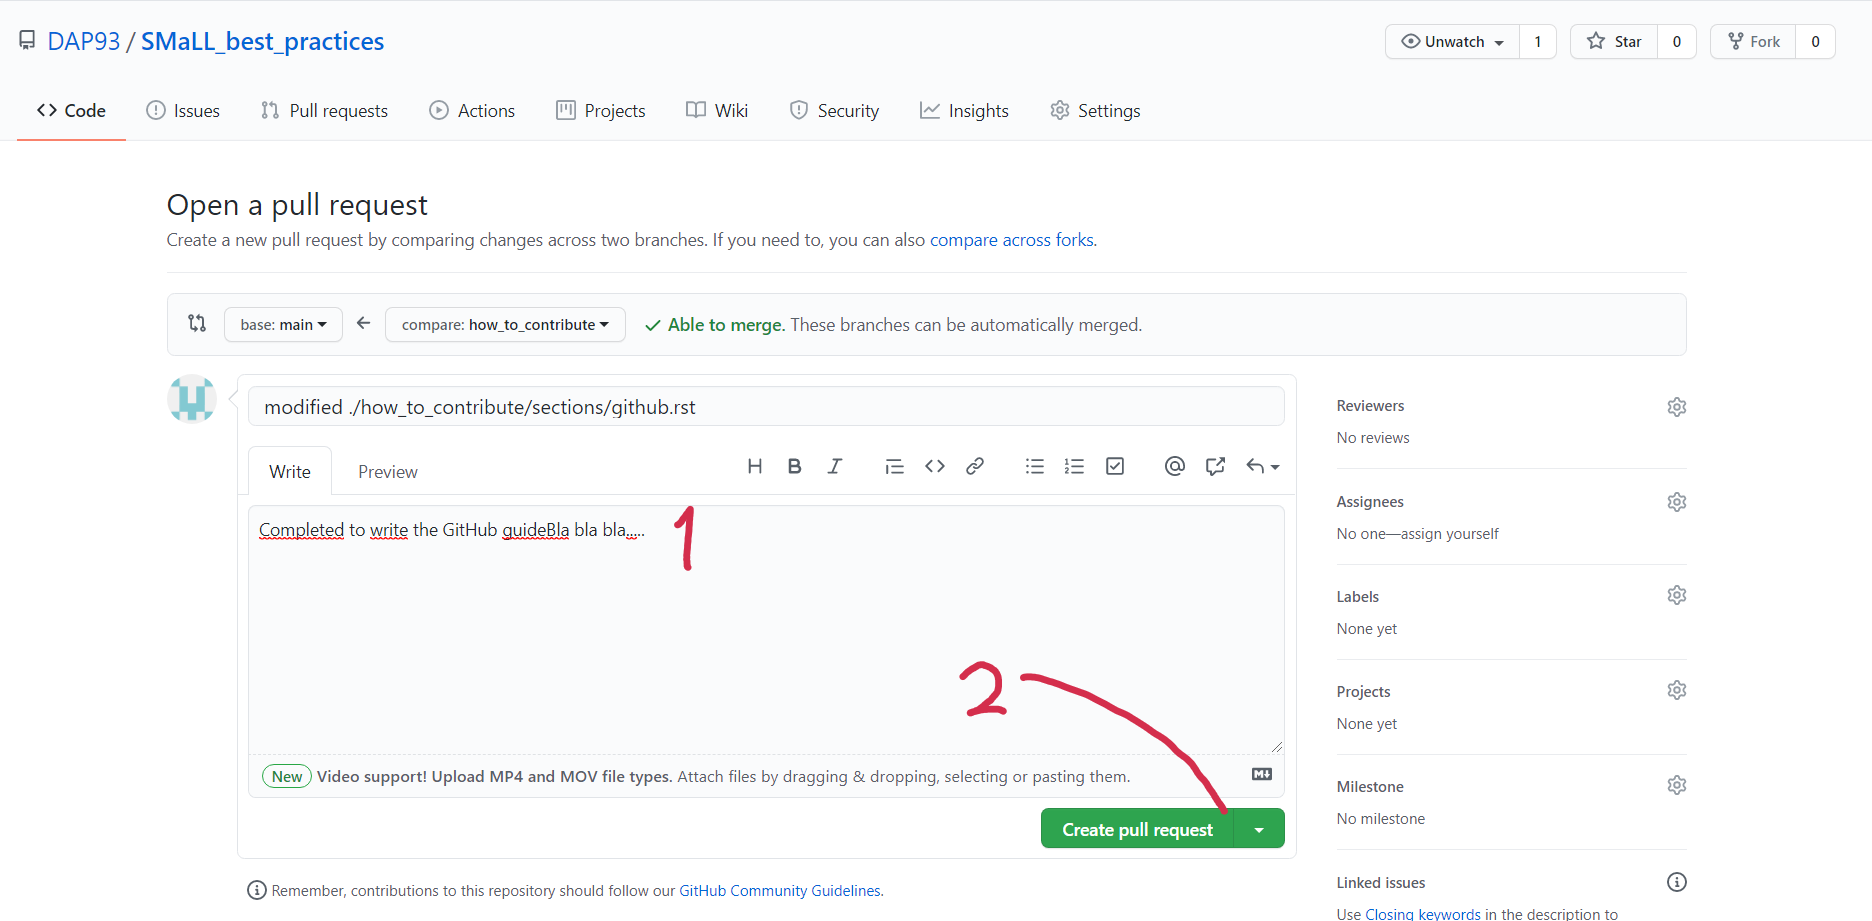
Fig. 1.6 submit pull request screen.
Soon we will be reviewing and merging all your changes into the master branch.
You will get a notification email once the changes have been merged.
Important
When you submit the branch to the review, please add some comments to allow the reader to understand what you did.